So here is a quick little video update called The Shaving Cream for the Shaved German Blonde.......
More later.......
Saturday, June 15, 2013
Here we are after much awaited time being able to produce our first all grain beer with the new system. It is a light German ale that we have appropriately named "Stumpy's Shaved German Blonde". Here is a short video of the goings on today as I brew.......
Thursday, May 16, 2013
I just completed a Chill Water Test where I took boiling water at about 210 degrees and pumped it through the wort ports of the 40 plate Heat Exchanger and also took 38 degree water that was in the Chill Water Chamber and pumped it through the water ports of the Heat Exchanger. The results were quite dramatic as I had to adjust the flow of the boiling water as it was coming out at 40 degrees. LOL I did figure it out and had it at about 55 to 59 degrees. For the first test it went mighty well if I do say so myself. Here is a little video on the action.......
More to come.......
Sunday, May 12, 2013
And another month has past and yet I still find myself having to order more items and await their delivery before I can get started brewing on this new system. I only have two orders outstanding and one I know will be here this next week and the other I have my doubts will ever show but I have been wrong before. We shall see.
A little bit has happened since my last entry here. I attached all the bell's and whistles to the system, that I had on hand, and did my first water test which turned out great. Sure there has to be some tweaking here and there but for the most part it all worked as expected.
Lets start off with what the guy's at my employers shop did for me. I needed a way to mount the 40 plate Heat Exchanger,
and I thought how nice a stainless steel plate attached to the underneath side of the wooden brew stand would look so I made a few measurements and went over to the shop and POW!
And so I mounted it, and the Heat Exchanger to it, and it looks like.......
And while I was thinking of building a wooden stand, and staining it to match the table to mount the pumps to, stainless steel would not only look awesome but will stand the test of time. So I again made a few measurements and took my pumps with me so we could lay out the hole configurations so we could use the punch machine and I wouldn't have 28 holes to try and drill by hand. Anyone who has ever drilled stainless steel knows exactly what I am speaking of. In any case, I only have the wooden table to drill to fasten the stand to.......
And then we have.......
The empty holes you see on either side of each pump are for splash guards eventually.
So the pumps came with their own cords with molded plugs already attached. I had to cut the plugs off and lengthen the cables and install the twist-lock plugs that I had ordered months ago. This meant that I had to butt-splice the wires and then use heat-shrink tubing to waterproof the connections.......
With everything hooked up and the control panel operating correctly I decided to do a water test........
And then I got things heated up a bit.......
And after about an hour.......
And so I rotated the water around through to the Mash Tun and then through the HERMs-Coil until the water temp matched with that of the HLT. I then transferred the water over to the Boil Kettle and cranked up the heat a bit.......
At this point I had already a rolling boil. Here is a video of what I had at about 197 degrees Fahrenheit.
!Warning!
I am no videographer or movie star. Just a good ol'boy trying to get his brew on.
And here are a few still photo's of the set-up.......
When the rest of what I have ordered makes it here I will get things ready to do another water test but this time will include the Chill Water Chamber where I have over 30 gallons of water at 34 degree's Fahrenheit to pump through the 40 plate Heat Exchanger to reduce the boiling wort to 70 degrees or lower.
But for now it is time to dim the lights.......
And enjoy some relaxation while I kick back and drink a cold craft beer and watch a little..........
I will try to post in the next week, or two, as I am waiting for a couple of items to show up and as I said I will be posting on the Chill Water Test. I will also be posting on the first brew day with this system so stay tuned and support your local craft breweries.
Brew Strong!
More to come.......
Tuesday, April 9, 2013
The pond liner wasn't going to work out as the shape and stiffness of it all just wasn't going to fit with all the lap-overs and wrinkles. I settled for a spay that the manufacture swore would do the trick for what I was doing. I have used their other product called "Liquid Tape" and I loved that stuff. I might just put this in all three to keep from rusting and ease of cleaning. Here is what I am talking about.......
Now before I used it the inside of the freezer looked like this.......
And just after one coat it looks like this.......
It seems to feel the gaps and cracks up right nicely. I will probably go with 7 coats in the chiller since I will be putting 30+ gallons of water in it which will stay in it and used when needed. The manufacture assured me that their product would stand up to it for however long. I personally would like to believe them but I will be looking for a large drip pan that this unit can sit inside that I can plumb to the outside just in case. I for one do not like the idea of having 30+ gallons of water on the floor. ;-)
I will put 2 or 3 coats in the two fermentation chambers to keep oxidation and rust from forming and if there be any spill over from a monster blow off then it will be easier to clean up.
More later.......
Saturday, April 6, 2013
I hope this addition to the blog finds each and everyone of you in good spirits and good health.
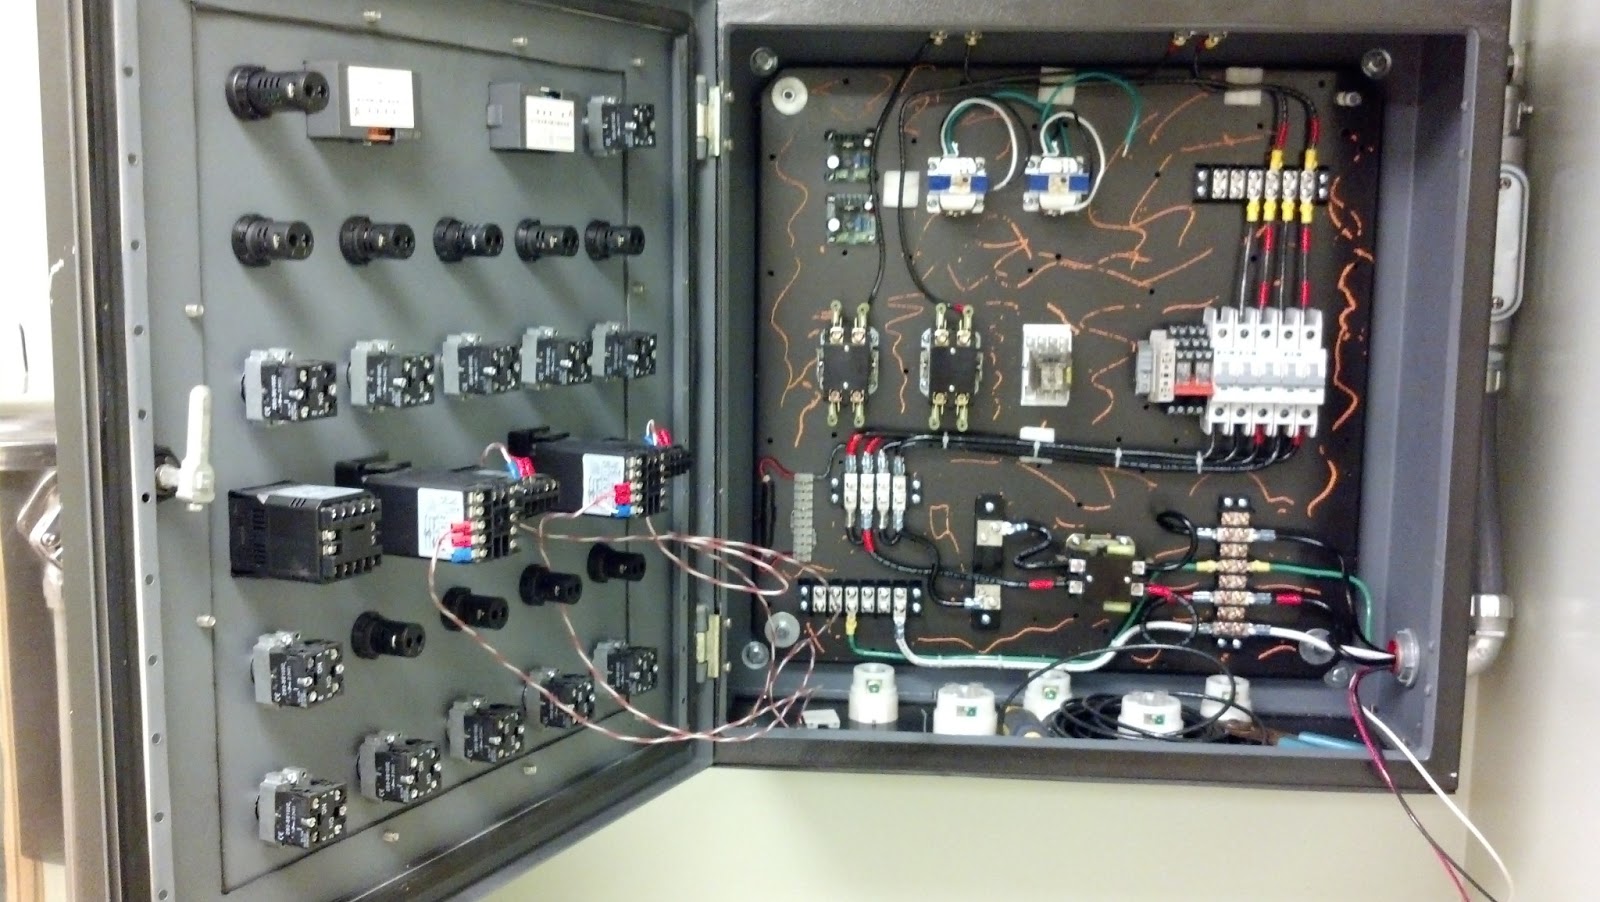
I began to wire and program the main control panel.......
The layout was a bit trying but I finally got to a conclusion and screwed them down.......
And as tedious as it is I began and.......
Finished!
Now for all the bell's and whistles.......
Everything works perfectly with exception to my Voltage and Amperage panel meters. The instructions were not very clear and I ended up frying both. The AC to DC power converters are adjustable and I neglected to check at what voltage they were set at before energizing the meters. They are suppose to be set at 5vdc or a little less but they were at least set at 18 to 25vdc. I will have to replace them. But I can use the panel without them so I am in no real hurry to replace them. I may even wait until I get to brew my first brew as I am getting really anxious now.
I also hit another snag as I have been unable to find a container that would hold at least 30 gallons of water that would fit in my 7 cubic foot freezer so I have opted to try a small pond liner. I will also have to build a collar for the freezer to run the pump lines through. Since I am going to have to do that I might as well build collars for all three of them.
I also still have to build a platform for the pumps as well as mount the pumps to it and then put all the parts and pieces for this whole system together. Still a bit to do but will be completed before I know it and then we can get down to the business of brewing well crafted beer. I can't hardly wait.
More later.......
Sunday, March 10, 2013
Just a little teaser. I was able to power up and program the Dwyer/Love controllers for the fermentation chambers. Got Fermentation chamber #1 all dialed in and ready to go. Stuck the stainless steel probe in a gallon of water with a heating pad under it and it all looks like a go. T - Minus a day off from what and where I can brew? This has me wanting to brew so I may just break down and brew a couple of extract brews on the stove and then ferment them in the new cambers just to get a feel of what they would be like.......